Managing Sign-Ups
When attendees sign up for your event, their sign-ups appear in the sign-up table on your event’s detail page. Village updates this table in real time — you don’t need to refresh the page to see new registrations.
Viewing sign-ups
Section titled “Viewing sign-ups”https://app.usevillage.app/events/[eventId]To see sign-ups for a specific event:
- Go to Events in the sidebar
- Click View Event to open its detail page
- Scroll down to the Sign-Ups section
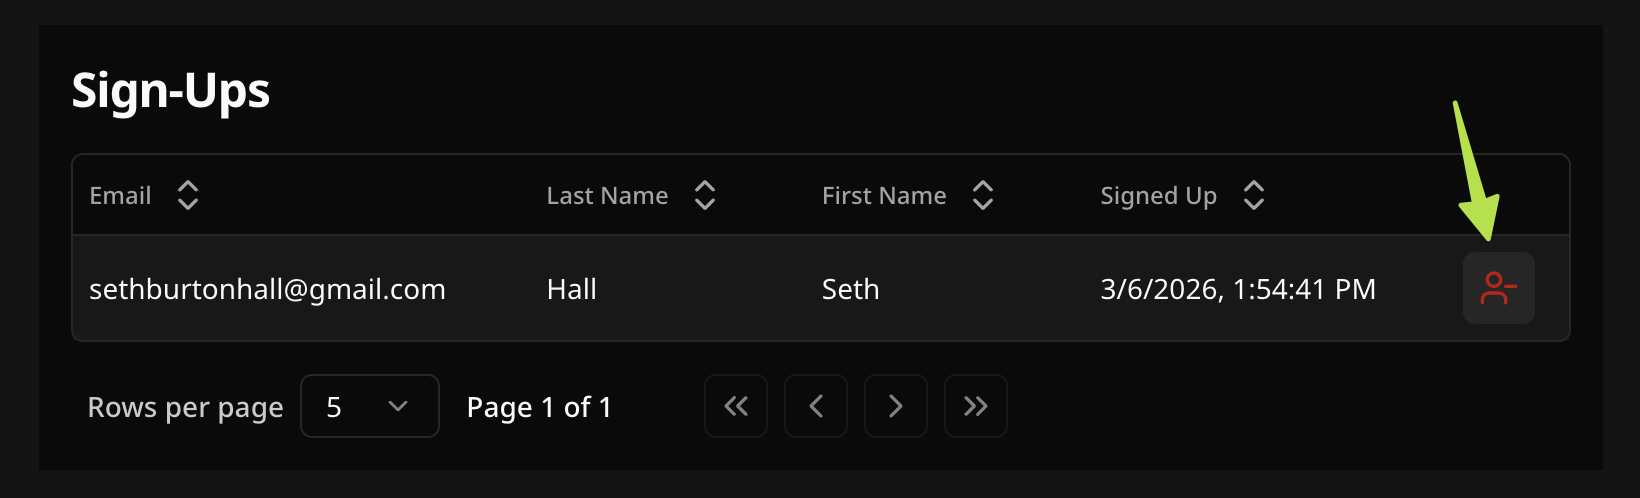
The sign-up table displays one row per attendee. It displays the attendee’s name, email, date signed up, and any additional fields you added to your sign-up form.
If no one has signed up yet, the section shows an empty state with a message indicating sign-ups will appear here when people register.
Slot-based events
Section titled “Slot-based events”For Appointment, Volunteer Shift, and Bring an Item events, sign-ups are grouped by slot instead of shown in a flat table. Each slot appears as its own card with:
- The slot label, date, and time (or item name)
- A fill rate badge showing how many spots are filled out of the total (e.g. 3 / 5) — shown in red when the slot is full
- The list of attendees signed up for that slot
This makes it easy to see at a glance which slots still have availability and who is assigned to each one.
Real-time updates
Section titled “Real-time updates”Village updates your event data live — no page refresh needed. This applies to:
- Sign-up table — new registrations appear as rows the moment someone submits the form
- Slot counter — the available slot count on your event detail page decreases in real time as spots are taken (and increases when a sign-up is removed or cancelled)
- Public sign-up page — attendees see the current available slot count live, so they always know if spots are still open
- Event Analytics — the Recent sign-ups feed and Top events list on the dashboard also update automatically Individual
This makes Village useful for active check-in scenarios — open your event on a tablet at the door and see arrivals as they register.
Removing a sign-up
Section titled “Removing a sign-up”To remove an attendee from an event:
- Open the event’s detail page
- Find the attendee in the sign-up table
- Click the remove icon (person with a minus sign) at the end of their row
- A confirmation dialog appears
In the confirmation dialog, you can:
- Choose whether to notify the attendee by email (checked by default)
- Add an optional personal note to include in the notification email (e.g. “Removed you from the event per our previous conversation — please reach out if you have questions.”)
Click Remove to confirm. The attendee’s slot is immediately returned to the event’s available count, and if you chose to notify them, they receive an email.
Attendee self-cancellation
Section titled “Attendee self-cancellation”Attendees can cancel their own spot without contacting you. Every sign-up confirmation email includes a link to manage their signup. When an attendee clicks it, they’re taken to a page where they can:
- Review the event details and their form responses
- Add the event to Google Calendar, Outlook, or Apple Calendar / iCal directly from the page — no need to find their original confirmation email
- Click Cancel my spot to remove themselves from the event
When they cancel, their slot is immediately returned to the event. You don’t need to take any action. See Email Notifications for more details on the confirmation email.
Checking in attendees Organization
Section titled “Checking in attendees ”OrganizationThe check-in column is off by default. Enable it per-event when you need it — for example, when running an in-person event and want to mark attendees as they arrive.
To enable check-in mode and start checking people in:
- Open the event’s detail page
- In the Sign-Ups section, click the Green Check toggle button to turn it on (it turns green when active)
- A Checked In column appears at the left of the table
- Click the circle icon next to an attendee’s name to mark them as present
The icon turns green to confirm the check-in. Click it again to remove the check-in if needed. The setting persists — if you leave the page and come back, check-in mode will still be on.
Exporting sign-ups to CSV Organization
Section titled “Exporting sign-ups to CSV ”OrganizationOrganization plan users can download all sign-ups for an event as a CSV file.
- Open the event’s detail page
- Go to the Sign-Ups section
- Click the Export CSV button
Event Analytics Individual
Section titled “Event Analytics ”IndividualIndividual plan users and above also see sign-up activity on their dashboard:
- Recent sign-ups — a live-updating feed of the latest registrations across all of your events, with the attendee name, event title, and time
- Top events by sign-ups — a ranked list of your events sorted by total sign-up count
Tips for managing sign-ups
Section titled “Tips for managing sign-ups”- Check in attendees — use the Checked In column in the sign-up table to mark attendees as they arrive. Open the event on a tablet at the door for a live check-in view.
- Use the search — if your event has many sign-ups, use the table’s built-in search to quickly filter for a specific name or email.
- Remove vs. cancel — removing a sign-up from your side and an attendee self-cancelling have the same effect: the slot is freed. The difference is who initiates it.